How to create a 360° VR Metaverse Animation in After Effects | Tutorial
11:22 AM The Metaverse! Everyone talks about it, but no one can really imagine it yet. Therefore, I want to bring you closer to the Metaverse through an example in this tutorial. I will show you, how to create a 360° VR video animation with your Insta360 ONE X2* consumer 360-camera in Adobe After Effects*.
Get your Insta360 ONE X2 here*:
Check out the full Metaverse tutorial here:
Final 360 VR Metaverse Animation Video:
Let me explain my idea behind it:
360 degree VR videos & photos are nothing new. No matter if they are viewed on a screen or through VR goggles, the situation is as follows. The viewer has the possibility to move freely around the room. There are no restrictions and instructions for the viewer. To guide the viewer through the 360 room in a controlled way, the use of animation is a possibility.
I see great potential in using this technology, to present stores, facilities, art, learning materials and much more.
Therefore, in this tutorial I want to show you how to create 360 VR animations with Adobe After Effects. To keep everything as simple as possible, I will use a static 360° video, that I created with my Insta360 ONE X2. For demonstration I create a few simple animations.
In my opinion, Adobe After effects is currently the best program for creating VR animations. If anyone knows other programs, please let me know!
360 VR After Effects tutorial
In the first step I open After Effects and create a new project. Then import your 360-photo or Video, where you want to add a VR animation. In my example I use a 360-video, which I created with my Insta360 ONE X2*. Drag and drop the footage on the composition symbol to create a new composition. To create the 360 degree animation environment, click on "window" and "VR Comp Editor" to open the After Effects plugin.
The "VR Comp Editor" window will open where you can create a 2D edit. The difference between a 2D edit and a 3D edit will be explained later.
Select your 360-video footage. I would recommend you to stay with the default compositions settings: width: 1920 and Ascept Ratio 16:9. Make sure to active the settings: “Use 2-node camera”, “use 3D Null camera control” and “center camera”. Then click on “Add 2D Edit”.
After Effects automatically creates your 360-Editing and Final-Output Environment. You can switch between the Editing and Output-Rendering Environment with the buttons “Edit” and “Output/ Render” in the VR Editor.
In the Editing Enviroment you can move around in the 360-room with the “Orbit Around Cursor Tool”. The Shortcut for this cursor is C! With “V” you switch back to the normal Cursor!
The first Editing Step, I show you, is how to remove the Tripod in the 360-video. Point down to the Tripod with the “Orbit Cursor” and the select the “Clone Stamp tool”.
Then double click on the Image. Now you see a small brush cursor. You can increase the diameter in the “Brushes” tab. Press “ALT” and select an area near the tripod. Then use the brush to paint over the tripod.
When you now click on the “Output” button in the VR Editor, you will see that the tripod has disappeared here as well. Now you will understand how the VR comp editor works. It is a kind of a converter. You can edit your 360 video in the editor and it will be automatically converted to a 360 degree video for export.
Here is an important information: If you switch back to the editor and change the perspective, the edited area will also change. This will also affect your Output.
Therefore, in order to perform further editing steps, a new editing environment must be created. I would recommend the use of folders, otherwise it quickly becomes confusing. For this I create a folder, which I name "Remove_tripod" and move everything into it. Then I take the Output Composition and drag and drop it on the composition symbol to create a new composition. With the “VR Comp Editor” I can now create a new 360-Editing and 360-Output Environment. This time I choose the "Add 3D Edit" option.
The difference between the "2D Edit" and "3D Edit" is the area of the edited effects in the 360 output video. With "2D-Edit", only the displayed area in the editor environment is transferred to the 360 output video.
For example: If I create a text in the "2D Edit" and do not change the camera angle, the text is visible in the ouptput video. But now when I change the camera position in the editor and go back to the output composition, the text is no longer visible. If I do this in the "3D Edit", it doesn't matter which camera angle I have in the editor. The text is always visible in the outuput video. And this is exactly what we need for a 360 VR Animation, which we are now creating.
For example: If I create a text in the "2D Edit" and do not change the camera angle, the text is visible in the ouptput video. But now when I change the camera position in the editor and go back to the output composition, the text is no longer visible. If I do this in the "3D Edit", it doesn't matter which camera angle I have in the editor. The text is always visible in the outuput video. And this is exactly what we need for a 360 VR Animation, which we are now creating.
Back to the “3D Edit” Editor! We can move around with the Orbit-cursor without effecting the Output sequence and the tripod is removed.
Now we can start to add the first 360 Animation. My idea is to create an avatar that guides the viewer through the 360 room. But first we start with a simple text example. For this I use the text tool and write an example test text on the image. When you now move around with the Orbit cursor the text always stays on the same place. To lock it, the text must be marked as a 3D layer. The text disappears, because it is now exactly in the zero axis. To make the text visible again, change the z-coordinate. Now the text becomes visible again in the 360 room. With the coordinate-system the text can be placed anywhere you like.
Now we can start to add the first 360 Animation. My idea is to create an avatar that guides the viewer through the 360 room. But first we start with a simple text example. For this I use the text tool and write an example test text on the image. When you now move around with the Orbit cursor the text always stays on the same place. To lock it, the text must be marked as a 3D layer. The text disappears, because it is now exactly in the zero axis. To make the text visible again, change the z-coordinate. Now the text becomes visible again in the 360 room. With the coordinate-system the text can be placed anywhere you like.
If you now change the perspective with the orbit cursor, the text remains fixed in the 360-room. Here you can experiment and create different texts, layers and much more. If you switch back to the output/render composition you will see that the objects are converted to the 360 video.
Of course, it is possible to animate the objects with movements. Keyframes are used for this purpose. For this, the keyframe function must be activated with the stopwatch symbol. Set a keyframe at a defined time. Then move the timecoursor to set another keyframe at another time stamp. In this example, the text moves from the first defined position to the second. This way a motion animation can be created. Now you are familiar with the most important basic functions.
Without going into detail, I have created a 360-guide avatar. I will now continue with it. I also created a motion animation path. The avatar moves across the whole 360 environment and the viewer is invited to follow it. The idea behind is, that the viewer explores the environment in a defined and controlled way.
To create depth it is necessary that the avatar disappears behind objects. For this, masking is required. I recommend you to mask directly in the output composition. My tip is to create a new "mask" composition. Add the 360 Raw material as top layer and then create your masks. Now the 360 VR video animation is finished.
After exporting, the video can be viewed in a 360 video viewer such as Insta360 Studio. You can also upload it to Youtube or Facebook and watch it, using your smartphone.
Above you find the Youtube video where I uploaded the final 360-video animation. If you want to create your own 360 VR content, here are all the necessary links!
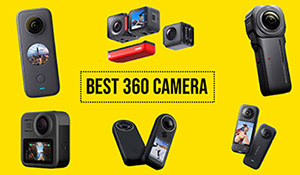
As 360 camera, I recommend the Insta360 ONE X2. The Insta360 ONE X2 is optimal for creating 360° material. Currently the Insta360 ONE X2 is the best consumer 360-camera on the market.
Get your Insta360 ONE X2 here*:
A link to the editing program Adobe After Effects can be found here! You can test Adobe After Effects for free. After the trial period there are different subscription models available.
I hope you enjoyed the tutorial. If you want to see more content about 360 VR video editing, subscribe to my Gimbal Guru Youtube Channel and never miss a video again!


0 comments